NBA 2K27 Pro-Am Defense Guide Strong Side and Weak Side Rotations

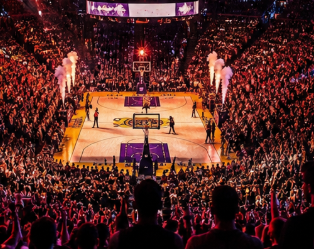
Pro-Am defense in NBA 2K27 is not just about staying in front of your matchup. Strong teams win possessions by controlling driving lanes, protecting the paint, and rotating quickly when the offense creates an advantage. A good defensive system makes every player responsible for more than just the man in front of them.

Understand the Strong Side and Weak Side

The strong side is the side of the court where the ball is located. The weak side is the opposite side, where defenders must prepare for cuts, skip passes, and corner threes.

AreaMain Defensive GoalPriority
Strong SideStop drives and passing lanesHigh
Weak SideProtect paint and shootersMedium
PaintPrevent easy finishesVery High
CornerContest catch-and-shoot attemptsHigh

On the strong side, defenders should avoid unnecessary help that leaves an open shooter. If the ball handler attacks the rim, the nearest help defender should slow the drive while the original defender recovers.

For players who spend a lot of time building their MyPLAYER, NBA 2K27 MT can also help with improving the overall setup, but defensive positioning remains more important than simply having better attributes.

Build a Simple Rotation Chain

The easiest Pro-Am defensive system is based on clear rotation rules. When one defender helps, another defender fills the open position.

Offensive ActionFirst RotationSecond Rotation
Strong-side driveStop the ballCover corner
Pick-and-rollBig helpsWeak side tags
Corner drivePaint helpRotate to shooter
Skip passClose outRecover to paint
Offensive cutBump cutterRecover outside

The center usually plays an important role because they can protect the rim while communicating where help is coming from. Guards should stay active without constantly abandoning shooters.

Weak-Side Defense Wins Possessions

Many Pro-Am players focus too heavily on the ball. However, the weak side is where many easy baskets begin. A weak-side defender should stay between their assignment and the paint while remaining close enough to recover to a shooter.

When the ball enters the paint, the weak-side defender may need to temporarily help. The key is to help early and recover immediately instead of standing in the lane.

Defending Drive and Kick

Drive-and-kick offenses are especially dangerous because one defensive mistake can create an open three. The first defender should stop the drive, while the next defender rotates toward the most dangerous passing option.

Do not have multiple defenders collapse on the same ball handler. Once the ball leaves the paint, defenders should sprint back to their assignments and communicate the rotation.

Common Defensive Mistakes

The biggest problems in Pro-Am usually come from poor communication rather than individual skill. Overhelping, chasing steals, and switching without communication can quickly destroy the defensive structure.

Players looking to optimize their setup may consider options related to buy NBA 2K27 MT, but no amount of upgrades replaces disciplined rotations and good communication.A strong NBA 2K27 Pro-Am defense should operate as one unit. The strong side pressures the ball, the weak side protects the paint and prepares for rotations, and every help defender knows where the next recovery should happen.

Once your team understands these basic rules, defense becomes much easier to organize. Instead of five players reacting separately, everyone starts moving as part of the same system.

Best MW4 Settings for Better Aim and FPS

The right settings can make a noticeable difference in Modern Warfare 4, especially when every gunfight comes down to reaction time and target visibility. You do not need to copy a professional player’s setup exactly, but a few changes to FOV, sensitivity, ADS behavior, motion blur, and audio can make multiplayer feel much cleaner.

These settings are intended as a practical starting point for the current MW4 Beta. Some options and values can change between the Beta and full release, so it is worth checking the menu again after major updates.

Best FOV Settings

For most players, a FOV between 100 and 110 is a good starting point.

A higher FOV gives you more peripheral vision and makes close-range movement easier to track. The downside is that distant targets appear smaller.

I recommend starting around 105 FOV and adjusting from there. Players who spend most of their time on SMGs may prefer a higher setting, while sniper and long-range players may feel more comfortable slightly lower.

Don’t automatically use the maximum FOV. If enemies become too difficult to see, reducing it slightly can actually improve your performance.

For anyone researching CoD MW4 Bot Lobbies, these settings are still worth learning because they improve normal multiplayer visibility and aiming rather than depending on matchmaking conditions.

Best Controller Sensitivity

There is no universal sensitivity that works for everyone.

A good starting point is around 6–6 for horizontal and vertical sensitivity. From there, make small adjustments instead of jumping several levels at once.

If you frequently overshoot targets, lower the sensitivity. If turning around feels too slow during close-range fights, increase it.

Your ADS sensitivity should also feel slightly more controlled than your general look speed. A moderate ADS multiplier can make tracking easier without making your hip-fire movement feel sluggish.

ADS Settings

Your ADS behavior should match your preferred playstyle.

Aggressive SMG players generally benefit from settings that allow them to aim quickly and transition between targets without unnecessary delays. AR and sniper players may prefer a more controlled approach.

Keep your ADS sensitivity consistent while learning a new weapon. Constantly changing multiple settings makes it difficult to determine whether your aim is actually improving.

For controller players, spend some time testing different aim response settings in a private match before taking the setup into competitive games.

Turn Off Motion Blur

For competitive multiplayer, Motion Blur should generally be disabled.

Camera movement and weapon effects can make targets harder to track, particularly during fast slides, turns, and close-range engagements. Removing unnecessary blur produces a clearer image and makes enemy movement easier to read.

If you prefer motion blur for a more cinematic experience, there is nothing wrong with leaving it enabled in casual play. For competitive FPS performance, however, clarity should take priority.

Improve Visibility on PC

PC players should prioritize stable frame rates over purely visual quality.

Start by lowering demanding options such as shadow quality, volumetric effects, and unnecessary post-processing. Keep textures at a level your graphics card can comfortably handle.

A stable frame rate is generally more valuable for competitive play than small visual improvements.

Also make sure your monitor is running at its highest supported refresh rate. A high-refresh display paired with a stable frame rate can make aiming and tracking feel considerably smoother.

PS5 and Xbox Settings

Console players have fewer graphics options than PC users, but there are still several useful adjustments.

Use the highest supported refresh-rate mode if your display supports it. Disable unnecessary motion effects, adjust FOV to a comfortable level, and make sure your controller sensitivity feels consistent.

Don’t blindly copy PC settings. Console performance and available display options can differ, so focus on achieving a smooth and stable experience.

Best Audio Settings

Audio is just as important as visual clarity.

Use headphones whenever possible and make sure important gameplay sounds are not buried under music or unnecessary effects. Lowering music volume can make footsteps, reloads, and other gameplay cues easier to hear.

Avoid setting overall volume so high that loud explosions become uncomfortable. The goal is clear positional information, not maximum volume.

Final Recommended Setup

A strong starting configuration is:

  • FOV: 105
  • Sensitivity: 6–6
  • ADS Sensitivity: Moderate
  • Motion Blur: Off
  • Music: Low
  • Headphones: Recommended
  • PC: Prioritize stable FPS
  • PS5/Xbox: Use the highest supported refresh-rate mode

These settings are not magic numbers. The best setup is the one that lets you consistently see targets, control recoil, and track enemies without fighting your own settings.

If you’re considering buy CoD MW4 Bot Lobby, keep in mind that third-party services are separate from official Call of Duty features and can create account or security risks. For normal multiplayer, mastering your FOV, sensitivity, ADS, visibility, and audio settings will have a much more reliable impact on your performance.

As MW4 receives additional updates, keep an eye on new graphics and controller options. Small adjustments can make a big difference once you find a setup that matches your playstyle.

Madden NFL 27 Juke-Spin Combo Guide

In Madden NFL 27, mastering advanced ball-carrier moves is one of the biggest differences between average players and competitive users. While speed and powerful running backs are important, the ability to manipulate defender AI can completely change the outcome of a play.

One of the most effective moves available is the Juke-Spin Combo, also known as the Juke-Spin Cancel. This advanced technique is designed to make defenders commit in one direction before your player quickly changes momentum and escapes into open space.

Whether you are playing Franchise Mode, head-to-head matches, or building your Ultimate Team roster, learning this move can help you create more explosive rushing plays and maximize your offensive potential.

What Is the Juke-Spin Combo in Madden NFL 27?

The Juke-Spin Combo combines two ball-carrier animations into one quick sequence:

  1. A juke move forces the defender to react and shift their momentum.
  2. A spin move immediately changes direction, allowing the runner to escape the tackle attempt.

The key idea is to make the defender’s AI predict the wrong movement. By attacking one direction and instantly reversing, your ball carrier can create separation and turn a short run into a big gain.

This technique is especially effective against defenders who aggressively pursue the ball carrier or overcommit to one side.

How to Execute the Juke-Spin Combo

The Juke-Spin Combo requires precise timing. The inputs must happen quickly before the initial juke animation fully finishes.

ActionPlayStation ControlsXbox Controls
Start JukeFlick Right Analog Stick Left or RightFlick Right Analog Stick Left or Right
Perform SpinPress CirclePress B
Escape DirectionMove Left Analog Stick toward open space + Hold R2Move Left Analog Stick toward open space + Hold RT

Step-by-Step Execution

Step 1: Approach the Defender

Run toward the defender while controlling your speed and positioning. The ideal timing window is around 2 to 3 yards away from the defender.

Step 2: Perform the Juke

Flick the Right Analog Stick left or right to trigger the juke animation. This causes your player to fake movement in that direction.

Step 3: Immediately Spin

Right after initiating the juke, press the spin button:

  • PlayStation: Circle 
  • Xbox: B 

Your player will attempt to cancel the first movement and spin away from the defender.

Step 4: Accelerate Into Open Space

After completing the spin, aim the Left Analog Stick toward your escape lane and activate sprint:

  • PlayStation: R2 
  • Xbox: RT 

A successful combo should leave the defender behind while your runner accelerates downfield.

Directional Strategy: Always Spin Opposite Your Juke

The most important rule for this move is understanding the direction combination.

Juke DirectionSpin DirectionResult
Flick Right Stick LeftSpin ImmediatelyFake left, spin back right
Flick Right Stick RightSpin ImmediatelyFake right, spin back left

The reason this works is because defenders usually react to the first movement. By reversing immediately, you exploit their momentum and create a better running lane.

3 Pro Tips for Mastering the Juke-Spin Combo

1. Release Sprint Before Starting the Move

One of the most common mistakes is holding sprint throughout the entire animation.

When your player is already running at maximum speed:

  • Turning becomes slower
  • The juke animation becomes wider
  • The spin transition becomes less responsive

Release R2/RT briefly before performing the combo to improve control and responsiveness.

2. Use Players With Juke Box or Evasive Abilities

Not every player performs these moves at the same level. Running backs with special abilities can execute advanced moves faster and more smoothly.

Look for players with:

  • Juke Box Ability 
  • Evasive Superstar Ability 

These abilities improve the speed and effectiveness of directional moves, making the Juke-Spin Combo much harder for defenders to stop.

For players building a competitive Ultimate Team lineup, investing in strong offensive weapons and improving your roster can make a noticeable difference. Many users choose to manage their resources carefully, including collecting Madden 27 coins to upgrade key positions and acquire better player cards.

3. Perfect Your Timing Window

Timing determines whether the move succeeds or fails.

Too Early:

  • Defender has enough time to recover
  • The fake movement loses effectiveness

Too Late:

  • Defender reaches your player before the spin animation completes
  • The tackle happens during the transition

The ideal moment is when the defender is approximately 2 to 3 yards away and preparing to make contact.

Best Situations to Use the Juke-Spin Combo

The Juke-Spin Combo works best in situations where defenders have limited space to react.

Recommended scenarios include:

Outside Runs

Running plays toward the sideline give you more room to escape after the spin.

Open-Field One-on-One Matchups

When a defender approaches alone, this move has a much higher success rate.

After Breaking the First Line of Defense

Linebackers and defensive backs often overcommit when chasing from behind. A well-timed juke-spin can create a huge gain.

Common Mistakes Players Should Avoid

MistakeWhy It Fails
Holding sprint during the entire comboSlower animation transition
Spinning in the same direction as the jukeDefender can predict the movement
Using it too far awayDefender recovers easily
Using it against multiple defendersHigher chance of being tackled

Improve Your Madden NFL 27 Ultimate Team Performance

The Juke-Spin Combo is only one part of building a successful offense in Madden NFL 27. A strong Ultimate Team requires the right combination of skilled players, strategic play calling, and consistent roster improvements.

Having enough resources allows players to upgrade positions, unlock better cards, and create more competitive lineups. Some players choose to buy MUT 27 coins to speed up roster development and focus more on gameplay rather than lengthy grinding.

Conclusion

The Juke-Spin Combo is one of the most rewarding ball-carrier techniques in Madden NFL 27. When executed correctly, it can manipulate defender AI, break tackles, and create game-changing plays.

The key to mastering this move is simple: release sprint before the animation, juke first, spin in the opposite direction, and attack the open field. With practice and proper timing, the Juke-Spin Combo can become one of the most powerful tools in your offensive arsenal.

PoE 3.29 Voyage Board Profit Guide

Path of Exile 3.29’s Curse of the Allflame mechanic may appear simple at first, but the true depth comes from mastering the Voyage Board. Individual Chart runs are only the foundation. The real power comes from combining nine Charts into a carefully planned 3×3 board where every placement decision can influence the final rewards.

For players who want to maximize efficiency, understanding the board system is more important than simply clearing encounters quickly. A smart Voyage strategy can create a consistent source of valuable rewards and help generate more POE currency throughout the league.

The Voyage Board Is The Real Endgame

The biggest mistake many players make is treating Charts as isolated missions. While early Chart runs are useful for learning the mechanic and collecting resources, the long-term value comes from building optimized Voyages.

The 3×3 board turns preparation into a major part of gameplay. Chart placement affects nearby modifiers, while Corruption Currents create different reward paths across the board.

Successful players focus on:

  • Creating strong adjacency combinations.
  • Protecting valuable reward modifiers.
  • Balancing risk with potential profit.
  • Using Lanterns at the correct moment.

Instead of relying only on character power, the Voyage system rewards players who understand patterns and plan ahead.

How To Build A Profitable Voyage

A profitable Voyage is not created randomly. Players need to identify what type of rewards they want and design the board around that goal.

For example, players focusing on valuable drops may prioritize Quantity and Rarity combinations, while others may prefer crafting materials or league-specific rewards.

A basic strategy can be divided into stages:

StageGoalStrategy
Early ChartsLearn mechanicsComplete safe runs and collect resources
Board SetupBuild synergyPlace matching modifiers together
Advanced VoyagesMaximize rewardsCreate optimized chains and manage risks
Endgame FarmingRepeat profitable layoutsRefine successful patterns

This approach allows players to gradually improve instead of wasting resources trying to create perfect setups immediately.

Understanding Corruption Currents And Lantern Timing

Corruption Currents are one of the most important parts of advanced Voyage planning. Their direction can influence how rewards develop across the board, making placement decisions extremely valuable.

Experienced players do not simply place the highest-value Charts anywhere. They consider how each position affects the entire layout.

Allflame Lanterns also play an important role. They are not just emergency tools; they are strategic resources that allow players to survive dangerous moments and continue pushing deeper into the Voyage.

Good Lantern usage means:

  • Saving them for high-pressure encounters.
  • Protecting valuable progress.
  • Avoiding unnecessary resource waste.
  • Creating opportunities to finish difficult sections.

The Crafting Loop Creates Long-Term Value

Dead Man’s Sulphur and Ducats give the mechanic a complete economic cycle. Players collect resources through Voyages, use them for crafting opportunities, and reinvest profits into stronger strategies.

This creates a system where consistent engagement is rewarded. Unlike some mechanics that only provide occasional excitement, Voyage Board progression improves as players gain knowledge.

Valuable PoE Items also become an important part of this system because optimized crafting and trading decisions can significantly increase overall profit.

Why Voyage Board Scales Better Than Expected

At first, the Voyage system can feel slow because players need time to understand the rules. However, that learning investment becomes valuable later.

The mechanic rewards preparation, decision-making, and experience rather than simple speed. Players who understand board patterns will naturally outperform those who treat every Voyage as a random encounter.

Curse of the Allflame’s biggest strength is that it creates a reason to think before acting. The best rewards do not come from rushing faster; they come from building smarter.

For many players, the Voyage Board may start as a confusing system, but with enough practice it transforms into one of the most rewarding farming mechanics in Path of Exile 3.29. It is not just another activity to complete—it is a puzzle that turns planning into profit.

Skull and Bones Fall of Lanitra Investigation Guide

The Fall of Lanitra is one of the investigation quests in Skull and Bones that reveals a hidden betrayal involving John Scurlock, one of the most important figures in the pirate world. Unlike standard contracts, investigations require players to explore locations, collect clues, and uncover the truth behind mysterious events.

Completing the Fall of Lanitra investigation rewards players with exclusive cosmetic items, including Scurlock’s Jacket and the Unbreakable Focus ship cosmetic. This guide explains every step needed to complete the investigation quickly.

Fall of Lanitra Investigation Overview

The investigation begins at Lanitra Outpost and follows a trail that leads from a hidden newspaper clue to a French settlement near Sainte-Anne. Players must discover evidence of a secret meeting, investigate Guerande, and finally confront John Scurlock directly.

Investigation StepLocationObjective
Find the first clueLanitra OutpostCollect the newspaper under the pillar
Investigate the betrayalGuerande settlementTrigger the plunder milestone
Confront ScurlockSainte-Anne pirate denDiscuss the betrayal
Claim rewardsCargo/Investigation tabObtain cosmetics

Step 1: Find the Newspaper Clue at Lanitra Outpost

To begin the investigation, sail to Lanitra Outpost, located on the northern side of the Sea People’s territory.

After arriving:

  1. Enter the outpost area.
  2. Follow the path down the rope to reach the lower camp.
  3. Turn left after descending.
  4. Look for a newspaper lying on the ground beneath a pillar.
  5. The clue can be found next to a sword.

Interact with the newspaper to reveal information about a suspected traitor who met with the French Governor. This clue updates the investigation and directs you toward the next location.

Step 2: Investigate Guerande Settlement

After reading the newspaper, your next destination is Guerande, a French company settlement located south of Sainte-Anne.

Travel to Guerande and begin a plunder event. You do not need to completely destroy the settlement or finish the entire plunder sequence.

The investigation progresses once you:

  • Start the plunder activity.
  • Reach the first milestone chest.
  • Collect the note that appears after reaching the milestone.

This note provides additional evidence about Scurlock’s involvement and updates the mission objective.

During your journey, having enough resources and currency can make exploration and combat much smoother. Many players choose to prepare by collecting Skull and Bones Items that improve ship performance, combat efficiency, and survival during dangerous encounters.

Step 3: Confront John Scurlock in Sainte-Anne

Once the Guerande investigation is complete, return to the pirate haven of Sainte-Anne.

Follow these steps:

  1. Enter the pirate den.
  2. Go to John Scurlock’s office.
  3. Speak with Scurlock.
  4. Choose the dialogue option that confronts him about the betrayal.

The conversation reveals the truth behind the Fall of Lanitra investigation. After the dialogue finishes, the investigation is considered complete.

Step 4: Claim Your Fall of Lanitra Rewards

After completing the conversation with Scurlock:

  1. Open your Investigation/Knowledge tab.
  2. Close the completed investigation.
  3. Open your cargo inventory.
  4. Claim your rewards.

The rewards include:

RewardType
Scurlock’s JacketCharacter cosmetic
Unbreakable FocusShip cosmetic

These exclusive cosmetics allow players to customize their pirate captain and ship with items connected to one of Skull and Bones’ major storylines.

Tips for Completing Fall of Lanitra Faster

Prepare Before Sailing

Before heading into enemy territory, make sure your ship has enough supplies. Guerande is a hostile area, and unexpected encounters can interrupt your investigation progress.

Use Fast Travel When Possible

If you have already unlocked nearby locations, fast travel can significantly reduce the time needed between Lanitra, Guerande, and Sainte-Anne.

Upgrade Your Ship for Safer Exploration

While the investigation itself is not extremely difficult, stronger ships make plundering settlements and surviving attacks much easier. Players looking to speed up progression may consider preparing with additional resources, including Skull and Bones Items for sale, to reduce the time spent gathering materials manually.

Why Complete the Fall of Lanitra Investigation?

Investigations in Skull and Bones provide more than just rewards. They expand the game’s world-building by revealing hidden relationships, betrayals, and stories behind major characters.

The Fall of Lanitra investigation is especially valuable because it gives players more insight into John Scurlock’s role in the pirate world while providing unique cosmetic rewards that cannot be obtained through regular activities.

Explore More Hidden Stories in Skull and Bones

The Fall of Lanitra quest is a good example of how Skull and Bones encourages exploration beyond traditional contracts and combat. By following clues, investigating locations, and uncovering secrets, players can experience more of the game’s narrative while collecting exclusive customization rewards.

Whether you are completing investigations, upgrading ships, or preparing for tougher naval battles, understanding each quest route can help you progress more efficiently across the dangerous waters of the Indian Ocean.