Best MW4 Settings for Better Aim and FPS

The right settings can make a noticeable difference in Modern Warfare 4, especially when every gunfight comes down to reaction time and target visibility. You do not need to copy a professional player’s setup exactly, but a few changes to FOV, sensitivity, ADS behavior, motion blur, and audio can make multiplayer feel much cleaner.

These settings are intended as a practical starting point for the current MW4 Beta. Some options and values can change between the Beta and full release, so it is worth checking the menu again after major updates.

Best FOV Settings

For most players, a FOV between 100 and 110 is a good starting point.

A higher FOV gives you more peripheral vision and makes close-range movement easier to track. The downside is that distant targets appear smaller.

I recommend starting around 105 FOV and adjusting from there. Players who spend most of their time on SMGs may prefer a higher setting, while sniper and long-range players may feel more comfortable slightly lower.

Don’t automatically use the maximum FOV. If enemies become too difficult to see, reducing it slightly can actually improve your performance.

For anyone researching CoD MW4 Bot Lobbies, these settings are still worth learning because they improve normal multiplayer visibility and aiming rather than depending on matchmaking conditions.

Best Controller Sensitivity

There is no universal sensitivity that works for everyone.

A good starting point is around 6–6 for horizontal and vertical sensitivity. From there, make small adjustments instead of jumping several levels at once.

If you frequently overshoot targets, lower the sensitivity. If turning around feels too slow during close-range fights, increase it.

Your ADS sensitivity should also feel slightly more controlled than your general look speed. A moderate ADS multiplier can make tracking easier without making your hip-fire movement feel sluggish.

ADS Settings

Your ADS behavior should match your preferred playstyle.

Aggressive SMG players generally benefit from settings that allow them to aim quickly and transition between targets without unnecessary delays. AR and sniper players may prefer a more controlled approach.

Keep your ADS sensitivity consistent while learning a new weapon. Constantly changing multiple settings makes it difficult to determine whether your aim is actually improving.

For controller players, spend some time testing different aim response settings in a private match before taking the setup into competitive games.

Turn Off Motion Blur

For competitive multiplayer, Motion Blur should generally be disabled.

Camera movement and weapon effects can make targets harder to track, particularly during fast slides, turns, and close-range engagements. Removing unnecessary blur produces a clearer image and makes enemy movement easier to read.

If you prefer motion blur for a more cinematic experience, there is nothing wrong with leaving it enabled in casual play. For competitive FPS performance, however, clarity should take priority.

Improve Visibility on PC

PC players should prioritize stable frame rates over purely visual quality.

Start by lowering demanding options such as shadow quality, volumetric effects, and unnecessary post-processing. Keep textures at a level your graphics card can comfortably handle.

A stable frame rate is generally more valuable for competitive play than small visual improvements.

Also make sure your monitor is running at its highest supported refresh rate. A high-refresh display paired with a stable frame rate can make aiming and tracking feel considerably smoother.

PS5 and Xbox Settings

Console players have fewer graphics options than PC users, but there are still several useful adjustments.

Use the highest supported refresh-rate mode if your display supports it. Disable unnecessary motion effects, adjust FOV to a comfortable level, and make sure your controller sensitivity feels consistent.

Don’t blindly copy PC settings. Console performance and available display options can differ, so focus on achieving a smooth and stable experience.

Best Audio Settings

Audio is just as important as visual clarity.

Use headphones whenever possible and make sure important gameplay sounds are not buried under music or unnecessary effects. Lowering music volume can make footsteps, reloads, and other gameplay cues easier to hear.

Avoid setting overall volume so high that loud explosions become uncomfortable. The goal is clear positional information, not maximum volume.

Final Recommended Setup

A strong starting configuration is:

  • FOV: 105
  • Sensitivity: 6–6
  • ADS Sensitivity: Moderate
  • Motion Blur: Off
  • Music: Low
  • Headphones: Recommended
  • PC: Prioritize stable FPS
  • PS5/Xbox: Use the highest supported refresh-rate mode

These settings are not magic numbers. The best setup is the one that lets you consistently see targets, control recoil, and track enemies without fighting your own settings.

If you’re considering buy CoD MW4 Bot Lobby, keep in mind that third-party services are separate from official Call of Duty features and can create account or security risks. For normal multiplayer, mastering your FOV, sensitivity, ADS, visibility, and audio settings will have a much more reliable impact on your performance.

As MW4 receives additional updates, keep an eye on new graphics and controller options. Small adjustments can make a big difference once you find a setup that matches your playstyle.


Skull and Bones Fall of Lanitra Investigation Guide

The Fall of Lanitra is one of the investigation quests in Skull and Bones that reveals a hidden betrayal involving John Scurlock, one of the most important figures in the pirate world. Unlike standard contracts, investigations require players to explore locations, collect clues, and uncover the truth behind mysterious events.

Completing the Fall of Lanitra investigation rewards players with exclusive cosmetic items, including Scurlock’s Jacket and the Unbreakable Focus ship cosmetic. This guide explains every step needed to complete the investigation quickly.

Fall of Lanitra Investigation Overview

The investigation begins at Lanitra Outpost and follows a trail that leads from a hidden newspaper clue to a French settlement near Sainte-Anne. Players must discover evidence of a secret meeting, investigate Guerande, and finally confront John Scurlock directly.

Investigation StepLocationObjective
Find the first clueLanitra OutpostCollect the newspaper under the pillar
Investigate the betrayalGuerande settlementTrigger the plunder milestone
Confront ScurlockSainte-Anne pirate denDiscuss the betrayal
Claim rewardsCargo/Investigation tabObtain cosmetics

Step 1: Find the Newspaper Clue at Lanitra Outpost

To begin the investigation, sail to Lanitra Outpost, located on the northern side of the Sea People’s territory.

After arriving:

  1. Enter the outpost area.
  2. Follow the path down the rope to reach the lower camp.
  3. Turn left after descending.
  4. Look for a newspaper lying on the ground beneath a pillar.
  5. The clue can be found next to a sword.

Interact with the newspaper to reveal information about a suspected traitor who met with the French Governor. This clue updates the investigation and directs you toward the next location.

Step 2: Investigate Guerande Settlement

After reading the newspaper, your next destination is Guerande, a French company settlement located south of Sainte-Anne.

Travel to Guerande and begin a plunder event. You do not need to completely destroy the settlement or finish the entire plunder sequence.

The investigation progresses once you:

  • Start the plunder activity.
  • Reach the first milestone chest.
  • Collect the note that appears after reaching the milestone.

This note provides additional evidence about Scurlock’s involvement and updates the mission objective.

During your journey, having enough resources and currency can make exploration and combat much smoother. Many players choose to prepare by collecting Skull and Bones Items that improve ship performance, combat efficiency, and survival during dangerous encounters.

Step 3: Confront John Scurlock in Sainte-Anne

Once the Guerande investigation is complete, return to the pirate haven of Sainte-Anne.

Follow these steps:

  1. Enter the pirate den.
  2. Go to John Scurlock’s office.
  3. Speak with Scurlock.
  4. Choose the dialogue option that confronts him about the betrayal.

The conversation reveals the truth behind the Fall of Lanitra investigation. After the dialogue finishes, the investigation is considered complete.

Step 4: Claim Your Fall of Lanitra Rewards

After completing the conversation with Scurlock:

  1. Open your Investigation/Knowledge tab.
  2. Close the completed investigation.
  3. Open your cargo inventory.
  4. Claim your rewards.

The rewards include:

RewardType
Scurlock’s JacketCharacter cosmetic
Unbreakable FocusShip cosmetic

These exclusive cosmetics allow players to customize their pirate captain and ship with items connected to one of Skull and Bones’ major storylines.

Tips for Completing Fall of Lanitra Faster

Prepare Before Sailing

Before heading into enemy territory, make sure your ship has enough supplies. Guerande is a hostile area, and unexpected encounters can interrupt your investigation progress.

Use Fast Travel When Possible

If you have already unlocked nearby locations, fast travel can significantly reduce the time needed between Lanitra, Guerande, and Sainte-Anne.

Upgrade Your Ship for Safer Exploration

While the investigation itself is not extremely difficult, stronger ships make plundering settlements and surviving attacks much easier. Players looking to speed up progression may consider preparing with additional resources, including Skull and Bones Items for sale, to reduce the time spent gathering materials manually.

Why Complete the Fall of Lanitra Investigation?

Investigations in Skull and Bones provide more than just rewards. They expand the game’s world-building by revealing hidden relationships, betrayals, and stories behind major characters.

The Fall of Lanitra investigation is especially valuable because it gives players more insight into John Scurlock’s role in the pirate world while providing unique cosmetic rewards that cannot be obtained through regular activities.

Explore More Hidden Stories in Skull and Bones

The Fall of Lanitra quest is a good example of how Skull and Bones encourages exploration beyond traditional contracts and combat. By following clues, investigating locations, and uncovering secrets, players can experience more of the game’s narrative while collecting exclusive customization rewards.

Whether you are completing investigations, upgrading ships, or preparing for tougher naval battles, understanding each quest route can help you progress more efficiently across the dangerous waters of the Indian Ocean.

Dark and Darker Perfect Block Secrets

The combat system in Dark and Darker has become much more technical after the recent weapon blocking adjustments. Winning a melee fight is no longer only about damage numbers or better equipment. For players who master defensive timing, a single successful Perfect Block (Riposte) can completely change the outcome of a duel.

Whether you are using a Longsword or Shield, understanding attack animations, impact timing, and reaction windows is the difference between randomly blocking and consistently punishing opponents.

Players who practice these mechanics can improve their survival rate without constantly relying on expensive gear or large amounts of Dark and Darker Gold.

A common mistake is pressing block as soon as an enemy starts attacking.

This usually fails because most attacks have three important stages:

Attack StageWhat HappensPlayer Response
Startup FrameEnemy begins the attack animationWatch movement and weapon direction
Impact FrameWeapon reaches your hitboxActivate block at the correct timing
Recovery FrameEnemy finishes the attackUse Riposte opportunity

The goal is not blocking early. The goal is creating contact between the enemy weapon and your guard at the exact moment when the block system recognizes a successful defense.

Longsword Riposte: Turning Defense Into Damage

The Longsword is one of the best weapons for players who enjoy technical combat.

A successful Riposte requires confidence and patience. Many beginners hold block too early, allowing opponents to delay their attack or change timing.

The better method is reading the animation.

Watch the opponent’s shoulder movement, weapon position, and attack direction. Different weapons have different swing speeds, so the timing cannot be identical for every enemy.

Against slower weapons, wait longer before committing.

Against fast weapons, focus more on prediction rather than reaction.

Shield Blocking: Control the Fight Tempo

Shield users have a different advantage. Instead of looking only for a counterattack, the goal is controlling space.

A successful shield block can interrupt enemy pressure and create opportunities for repositioning.

Listen carefully during combat. The sound of a successful block is different from a normal hit. Visual effects also provide information, especially the impact sparks that appear when your guard connects correctly.

These signals help players build muscle memory.

Training Your Timing Through Repetition

Perfect Block is not something players master by reading guides alone. It requires repeated practice against different attack patterns.

Focus on one weapon type at a time.

Learn its swing speed.

Practice blocking only at the final moment.

Repeat until the timing becomes automatic.

The goal is creating a natural reaction instead of consciously calculating every attack.

Gear Preparation and Mechanical Skill

While skill is the foundation of melee combat, having the right equipment still matters. Players who want to test different builds and practice advanced setups often prepare multiple loadouts.

Managing resources efficiently allows more training opportunities, and some players choose to use Dark and Darker Gold for sale options to quickly create practice gear without slowing down progression.

Perfect Blocking is one of the most rewarding mechanics in Dark and Darker. A player who understands timing can defeat stronger opponents by making better decisions rather than simply having better equipment.

Master the attack frames, learn the sound cues, and train your reactions until blocking becomes instinct.

In Season 10, the best fighters are not always the ones who attack first. They are the ones who know exactly when to defend — and when to strike back.

College Football 27 Dynasty Mode: NIL System Completely Rewrites Recruiting Strategy

College Football 27 introduces one of the most transformative dynasty mode systems the series has ever seen: a fully simulated Name, Image, and Likeness (NIL) economy. This system fundamentally changes recruiting, roster retention, and transfer portal dynamics by tying every player’s value to evolving financial expectations rather than static ratings or simple scholarship offers.

For players who also engage with the in-game economy, resources like College Football 27 Coins will naturally become part of broader roster-building strategies, especially when managing long-term dynasty commitments and competitive online leagues.

NIL Expectations Are Now the Core of Recruiting

At the heart of College Football 27’s dynasty overhaul is a simple but powerful idea: every player now has an “expected NIL value.”

This value is not universal. It fluctuates based on:

  • School prestige
  • Player star rating
  • Position value (QB and premium positions demand more)
  • Dealbreakers and motivations
  • Brand exposure preferences
  • Coaching and program perks

A 5-star quarterback recruiting battle between a powerhouse program and a smaller school is no longer just about ratings or depth charts. The smaller program may need to offer significantly higher NIL compensation just to stay competitive, reflecting real-world recruiting economics.

Dynamic Expectations That Grow Over Time

One of the most important changes is that NIL expectations are no longer fixed.

A player can:

  • Increase their NIL demand after a breakout season
  • Request more money after awards or improved overall rating
  • Adjust expectations based on team success or role
  • Threaten transfer portal entry if underpaid

This creates a living contract system. A freshman might accept a modest deal, but by junior year, a star performer could demand exponentially more.

This is where dynasty budgeting becomes a long-term strategy rather than a one-time recruiting decision.

The Risk-Reward System of Overpaying Early

College Football 27 introduces a strategic dilemma: overpaying early can secure elite recruits—but it can also destabilize your entire roster budget later.

For example:

  • Offering 200% of a recruit’s baseline NIL may instantly win recruiting battles
  • But that same player’s future expectations will scale from that inflated starting point
  • By the time they become a star, they may demand unsustainable compensation

This creates a “compound contract effect” where early decisions directly shape future salary pressure across your roster.

Transfer Portal Becomes a Financial Battlefield

The transfer portal is now heavily NIL-driven. Unlike high school recruiting, where relationships and scouting still matter, transfers are much more transactional:

  • Players already know their value
  • Playing time and money dominate decisions
  • Negotiation windows are shorter and more aggressive

If your program cannot match evolving expectations, even elite starters can leave mid-dynasty.

Roster Management and Budget Compression

Another major system change is roster-wide NIL management. Every player now has:

  • Expected NIL value
  • Current NIL compensation
  • Satisfaction and retention risk

This forces constant roster optimization. Coaches must decide:

  • Who is worth extending financially
  • Who should be replaced by younger, cheaper talent
  • Where to allocate limited NIL resources (QB vs OL vs depth)

A single superstar quarterback can now consume a disproportionate share of your NIL budget, forcing sacrifices elsewhere.

Recruiting Strategy Shift: Scouting First, Spending Second

Unlike previous entries, College Football 27 separates scouting from recruitment more strictly:

  • Preseason is dedicated entirely to scouting
  • Scholarships now include NIL considerations immediately
  • Blind mass-offering is no longer viable

This makes early-season evaluation more important than ever. Misreading a recruit’s value can result in long-term budget inefficiency that takes multiple seasons to correct.

Weekly NIL Adjustments and Influence System

Recruiting battles now evolve week-to-week based on NIL adjustments:

  • Meeting expected NIL boosts interest gain
  • Underpaying reduces weekly influence
  • Overpaying increases interest—but raises long-term cost floor

There is even a cap on weekly influence bonuses for aggressive bidding, creating diminishing returns on excessive spending.

This ensures NIL strategy is not just about winning recruits—but winning them efficiently.

Long-Term Dynasty Implications

The NIL system effectively turns dynasty mode into a financial simulation layered over traditional football management. Success now depends on:

  • Budget forecasting across multiple seasons
  • Strategic overpayment only when necessary
  • Retention planning for rising stars
  • Balanced roster investment instead of superstar stacking

For players who also track in-game progression and resource optimization, even external systems like Buy CFB 27 Coins often get discussed in the context of accelerating roster experimentation and dynasty rebuilding strategies.

Conclusion

College Football 27’s NIL system is not just a feature—it is a structural redesign of dynasty mode itself. Recruiting is no longer about simply identifying talent, but about predicting financial trajectories and managing long-term roster economics.

Programs that adapt early will gain a massive advantage. Those that treat NIL like a traditional scholarship system will quickly find themselves outpaced, outbid, and out-recruited in an increasingly complex collegiate football ecosystem.

Game Changing Black Tech Grow a Garden 2 Secrets Tips Infinite Sheckles

In the competitive economy of Grow a Garden 2, standard farming methods are no longer enough to keep up with top-tier players. To truly dominate servers and scale toward infinite Sheckles, players rely on advanced mechanics, timing strategies, and high-efficiency resource optimization.

High Efficiency Growth Timing Strategy

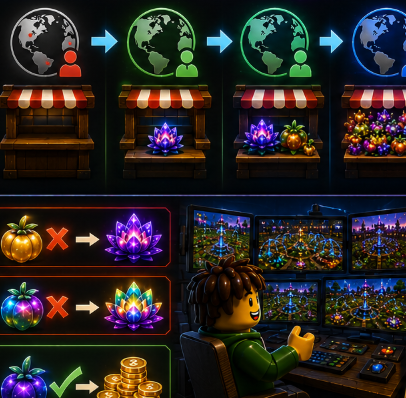
One of the most important advanced concepts is growth timing control. Instead of harvesting crops immediately at maturity, experienced players focus on optimizing environmental cycles such as day and night transitions.

By aligning harvest timing with in-game multipliers and server state changes, players can maximize mutation chances and overall yield value. Crops like Moon Bloom and Dragon’s Breath benefit heavily from precise timing, especially when managed in fully optimized sprinkler layouts.

Market Rotation and Server Optimization

Another core strategy involves smart server rotation and shop timing efficiency. High-level players avoid crowded servers and instead target fresh or low-competition instances to gain faster access to limited stock items.

This is where trading intelligence becomes critical. Many players actively monitor Grow a Garden 2 Items availability and reposition themselves to secure high-demand seeds before the market becomes saturated. Others engage in trading ecosystems where Grow a Garden 2 Items for sale listings are used to quickly scale inventory and unlock premium progression paths.

Automated Farming and Layout Efficiency

Passive income scaling depends heavily on layout design. The most effective farms use compact, fully optimized sprinkler coverage systems that ensure every crop remains at maximum growth efficiency.

Master Sprinklers and stacked irrigation zones allow players to maintain constant hydration without manual intervention. This reduces downtime and increases total mutation roll frequency, which is essential for long-term wealth generation.

When combined with high-value crops, this system turns a simple garden into a continuous production engine.

Mutation Scaling and Value Multipliers

The real financial breakthrough comes from mutation stacking. By combining environmental timing, optimized layouts, and high-tier boosts, players can significantly increase the probability of rare Gold and Rainbow variants.

These high-value outputs are the backbone of endgame progression. Once stabilized, mutation cycles create exponential income growth that quickly outpaces traditional farming methods.

To reach true infinite Sheckles potential, players must combine three systems: timing optimization, automated production, and market efficiency. High-tier Grow a Garden 2 Items accelerate progression speed, while active trading using Grow a Garden 2 Items for sale listings provides rapid access to rare upgrades.