7 Ways to Solve the Audio Crackling Issue in Helldivers 2

Audio is an essential part of the Helldivers 2 experience. The tension of bug swarms, the roar of explosions, and the chatter of your squadmates make every mission more immersive. But for some players, a frustrating issue has cropped up: audio crackling or distortion during gameplay. If you’ve encountered this, don’t worry—there are several fixes you can try to restore smooth, crisp sound.

1. Update Your Audio Drivers

Outdated or corrupted drivers are one of the most common causes of audio crackling. Visit the official site for your sound card or motherboard and make sure you’re running the latest version. After updating, restart your PC before launching Helldivers 2 again.

2. Adjust In-Game Audio Settings

Sometimes the game’s own audio engine struggles under certain configurations. Lower the sound quality in the settings menu, or try toggling options like spatial audio or surround sound. This can reduce stress on your system and eliminate crackling.

3. Check Your Sample Rate

Right-click the speaker icon in Windows, go to Sound Settings, and check your output device’s sample rate. Many players have found that setting it to 48 kHz or 44.1 kHz prevents distortion. Extremely high sample rates can sometimes cause instability in games.

4. Disable Exclusive Mode

Exclusive Mode allows apps to take full control of your audio device, but it can also trigger conflicts. In the device properties, uncheck “Allow applications to take exclusive control of this device” and test the game again.

5. Reduce Background Processes

Helldivers 2 can be demanding, and if your system is under heavy load, audio processing may suffer. Close unnecessary apps before launching the game. This is especially helpful if you’re running streaming software, voice chat, or browsers at the same time.

6. Verify Game Files

Corrupted or missing files can cause more than just crashes—they can also affect audio performance. Use your launcher’s “verify integrity” or “scan and repair” function to ensure your installation is clean. This often fixes unexpected sound issues.

7. Reinstall or Switch Audio Devices

If none of the above works, try reinstalling your audio drivers completely, or test the game with a different output device, like headphones instead of speakers. Many players report that simply switching to another audio device resolves the crackling.

Crackling audio can ruin an otherwise intense Helldivers 2 mission, but most of the time, the fixes above will get you back into the fight with clear sound. While you’re optimizing your setup, you might also be thinking about ways to improve your gameplay progression. Many players look into resources like buy Helldivers 2 super credits or stock up on cheap Helldivers 2 requisition slips to unlock gear more efficiently. Sites like U4GM are often discussed among the community, though the core of the experience always comes down to teamwork and strategy.

Advanced Tactics for Competitive COD BO7 Players

The release of Call of Duty: Black Ops 7 (COD BO7) introduces a new level of strategic depth for players who thrive on competitive gameplay. With its dynamic co-op campaign, global progression systems, and the ambitious new Endgame mode, BO7 is more than just another entry in the legendary franchise—it’s a reinvention designed for long-term mastery. Below, we break down advanced tactics and strategies to help competitive players stay ahead of the curve.

For players who are serious about maximizing their competitive edge, preparation goes beyond just tactics and loadouts. Whether you’re looking to practice in a controlled environment or accelerate your progression, many turn to specialized services that provide a more tailored multiplayer experience. If you’re aiming to sharpen your skills quickly, you can explore options to buy COD BO7 lobby access, giving you a chance to refine strategies, test builds, and prepare for high-stakes matches in a focused setting.

Mastering the Co-Op Campaign

1. Dynamic Difficulty Awareness

Unlike earlier campaigns in the series, the COD BO7 campaign adjusts its challenge based on the number of players in the session. This means that a solo player will face more manageable threats, while a four-person squad will encounter stronger enemy resistance and smarter AI behavior.

  • Solo Advantage: Focus on stealth, precision, and resource management. You’ll have more time to assess the battlefield and fewer chaotic engagements.
  • Squad Play: Communication becomes the most critical weapon. Assign roles such as Medic, Assault, Support, and Sniper to keep your team balanced.

2. Mission Variety and Adaptive Loadouts

Mission design in BO7 emphasizes variety, including stealth infiltrations, high-octane vehicle chases, and large-scale assaults. To adapt:

  • Rotate your primary and secondary weapons frequently to match mission demands.
  • Leverage environmental cover and team positioning, especially during large firefights.
  • Take advantage of the campaign’s adaptive gear system to stay one step ahead of mission shifts.

Leveraging Global Progression

One of the most exciting innovations in COD BO7 is Global Progression, allowing XP, weapon upgrades, and challenges completed in the co-op campaign to transfer directly to Multiplayer, Zombies, and even Warzone.

1. Early XP Grinding in Campaign

Competitive players should use the campaign as a training ground to unlock weapon camos and attachments before entering multiplayer. Campaign missions often allow for higher XP per minute than early PvP matches.

2. Weapon Familiarity and Efficiency

  • Stick with one or two primary weapons early on to fully unlock attachments.
  • Experiment with camos and perks in PvE before bringing them into PvP.
  • Focus on completing challenge milestones (headshots, killstreaks, objective completions) to maximize rewards.

Dominating the Endgame Mode

The Endgame is BO7’s standout feature, a massive 32-player, survival-driven mode that combines campaign mechanics with MMO-style progression. To succeed here, players need more than just raw reflexes—they need planning and synergy.

1. Operator Specialization

Endgame allows players to bring their Operators and personalized abilities into play.

  • Tank-style builds: Increase survivability with health and armor perks.
  • Support roles: Focus on healing and buffing allies to keep the team alive during prolonged battles.
  • DPS specialists: Use high-damage loadouts for pushing through tougher waves.

2. Custom Loadout Optimization

  • Always keep versatility in mind—carry weapons for both close-quarters and long-range combat.
  • Equip scorestreaks that benefit large teams, such as UAV sweeps or ammo resupply.
  • Don’t neglect secondary gadgets like stuns and EMP grenades—they become vital when overwhelmed.

3. Avalon Map Strategy

Since the entire Avalon map is unlocked in Endgame, strategic positioning is key.

  • Identify chokepoints to funnel enemies.
  • Secure elevated areas for snipers and overwatch players.
  • Rotate as a squad to avoid being encircled by AI forces.

Competitive Edge for Multiplayer Transition

For players aiming to dominate in COD BO7 Multiplayer, the campaign and Endgame serve as essential preparation tools.

  • Skill Transfer: Use Endgame runs to sharpen reflexes under pressure.
  • Team Synergy: Build communication habits in the campaign that translate to competitive matches.
  • Loadout Testing: Experiment with different weapon setups in PvE before committing to them in ranked matches.

COD BO7 redefines what it means to be competitive in the Call of Duty franchise. From its adaptive campaign to the all-new Endgame mode, the game rewards players who think strategically, coordinate effectively, and continuously refine their skills. By mastering the co-op missions, leveraging global progression, and tackling Endgame with tactical precision, you’ll gain a serious advantage heading into multiplayer and Warzone Season 1.

For competitive players, the road to dominance begins long before the first PvP match—it starts with mastering every corner of the battlefield in Black Ops 7.

Top Tier Classes in Warborne Above Ashes: A Comprehensive Tier List

Warborne Above Ashes (WAA) is a game that offers a rich variety of classes, each with unique abilities and playstyles. Whether you’re a newcomer trying to get a grip on the game or a seasoned player looking for the best performance, selecting the right class can significantly impact your gameplay experience. In this comprehensive tier list, we break down the top-tier classes in Warborne Above Ashes and explain why they stand out. Along the way, we’ll also highlight key assets like Warborne Above Ashes Solarbite and WAA Solarbite, which can elevate your gameplay.

S-Tier: The Dominant Force

In any competitive game, some classes rise above the rest due to their balance of power, utility, and versatility. In Warborne Above Ashes, the S-tier classes are nothing short of overwhelming in the right hands.

1. Solar Vanguard
The Solar Vanguard class is the epitome of damage output and crowd control. With the ability to deploy powerful AOE (Area of Effect) attacks and manage large groups of enemies efficiently, this class is highly sought after. Players who excel with this class can deal massive damage while maintaining effective control over the battlefield. One of the primary reasons for its dominance is its synergy with Warborne Above Ashes Solarbite, a rare item that significantly boosts the class’s power when equipped. This makes the Solar Vanguard not only one of the highest damage-dealing classes but also one of the most versatile.

2. Arcane Sentinel
Arcane Sentinels are masters of both offense and defense. Their utility spells can both shield teammates and decimate enemies with high-velocity magical attacks. What makes them truly special is their ability to adapt to any situation, whether defending a position or pushing forward in an assault. For players who enjoy a balanced playstyle, this class is ideal. Arcane Sentinels also gain significant benefits when utilizing WAA Solarbite, which enhances their defensive capabilities and spells, making them even more formidable.

A-Tier: Balanced and Reliable

These classes may not reach the raw power of S-tier, but they are incredibly reliable and strong in most situations. Whether you’re taking on large mobs or working through complex dungeons, these classes excel in all aspects of gameplay.

1. Flame Blades
Flame Blades are excellent for those who love high mobility and rapid, consecutive strikes. This class excels in close combat and can dish out significant burst damage, especially when supported by Warborne Above Ashes Solarbite. While their defense is somewhat lacking, players who can manage their positioning and timing will find this class extremely rewarding.

2. Stormbringer
Known for their speed and agility, Stormbringers are a favorite among players who prefer a hit-and-run style of play. They wield the power of wind and lightning, making them extremely fast and unpredictable. Their ability to avoid damage while dealing high amounts of single-target damage makes them perfect for experienced players who want to maintain offensive pressure without sacrificing mobility.

B-Tier: Strong, but Situational

B-tier classes are solid choices, but they may have limitations that make them less versatile in every encounter. That said, they can still shine in certain scenarios and are worth considering for players who prefer a specific playstyle.

1. Earthshaper
Earthshapers are heavy tank classes that are great for absorbing damage and holding the front line. Their sheer resilience allows them to take on a lot of punishment, but they often lack the offensive capabilities needed to close out fights quickly. They pair well with support classes and can be a vital part of a team composition, especially in longer battles.

2. Shadow Warden
Shadow Wardens are stealth experts and great at picking off isolated targets. However, their reliance on stealth and high-risk, high-reward tactics means they can struggle in large-scale battles where visibility and coordination are key. For players who enjoy a stealth-based, strategy-driven approach, the Shadow Warden can be a strong class, though it may require precise execution to shine.

C-Tier: Niche and Weak

These classes fall behind the others in terms of overall power and flexibility. However, they can still be useful in specific situations, depending on playstyle and the needs of the team.

1. Frost Seeker
While Frost Seekers can slow down enemies and control battlefield movements, their overall damage output is relatively low. Players who favor status effects and crowd control may find this class enjoyable, but it’s harder to dominate with compared to the other tiers.

2. Beastmaster
Beastmasters have an interesting niche in summoning creatures to fight alongside them. However, these summons lack the power to be effective in high-level play, and the class feels underwhelming when compared to the stronger direct-damage or support classes. For players looking for a more thematic approach, Beastmaster can be fun, but they will often struggle against higher-tier classes.

Choosing the best class in Warborne Above Ashes (WAA) depends largely on your preferred playstyle, whether you’re looking for a tanky frontliner, a stealthy assassin, or a powerful damage dealer. The game’s unique mechanics, such as Warborne Above Ashes Solarbite and WAA Solarbite, allow players to further tailor their experience, enhancing their character’s strengths and abilities. Understanding the strengths of each class and how they interact with these special items is key to dominating the battlefield.

While S-tier classes provide the most overall utility and strength, A-tier classes offer a great balance for those who prefer a mix of defense and offense. Ultimately, the right choice will depend on your strategy and role within the team. Whether you’re a seasoned player or a beginner, experimenting with different classes is the best way to find your perfect fit in Warborne Above Ashes.

How to Master Seasonal Horde Events in Diablo 4 S10

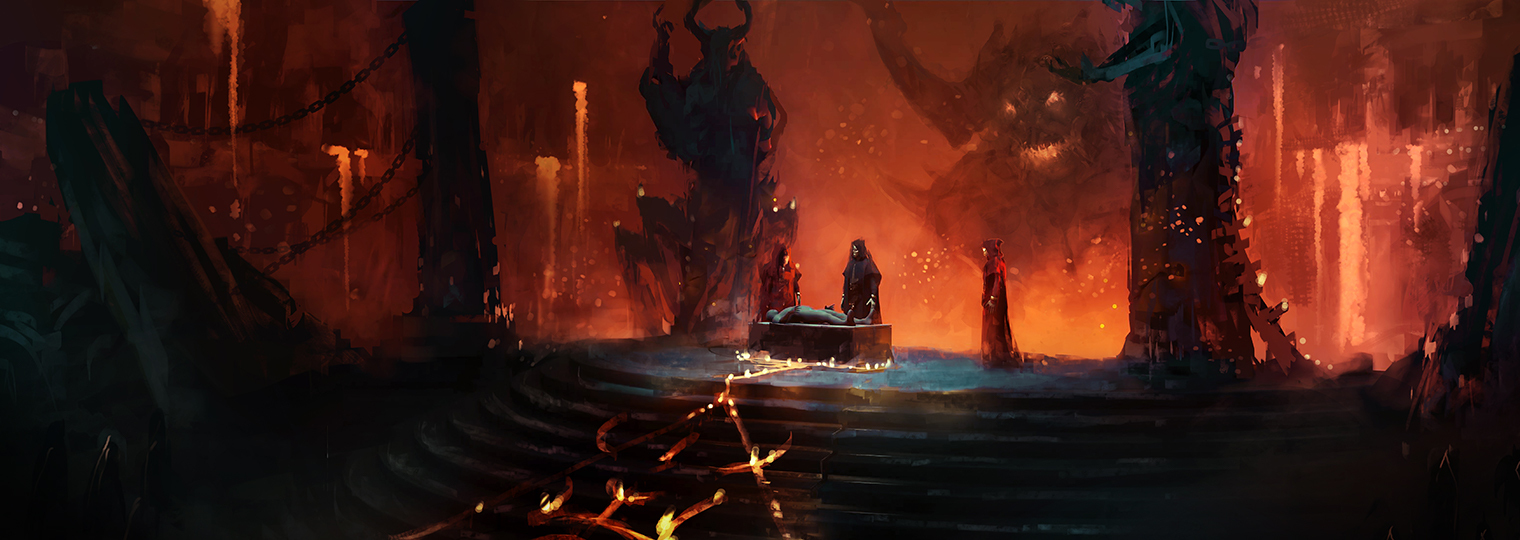
Seasonal Horde Events in Diablo 4 S10 are special limited-time challenges where players must face wave after wave of relentless enemies. These events test your skills, teamwork, and strategic thinking as you battle your way through hordes of foes to claim valuable rewards.

Seasonal Horde Events in Diablo 4 S10 are triggered periodically throughout the season, giving players the opportunity to test their mettle against increasingly difficult waves of enemies. Each event has multiple stages, with rewards becoming more lucrative as you progress.

In Diablo 4 Season 10, teaming up with friends—or even random adventurers—can make a huge difference. Coordination and communication are everything, especially when the horde starts piling in. You’ll want to plan your tactics, chain your crowd-control skills, and make sure everyone’s using their best gear. Items like Banner of Might for buffs, Ashen Crown for AoE damage, or Temporal Chain for slowing enemies can really turn the tide.

Participating in Seasonal Horde Events is worth it for more than just the thrill. Successful runs can net you rare weapons, legendary armor, crafting resources, and exclusive cosmetics. For example, you might grab a Frostforged Blade, Emberhide Chestplate, or unique Aspect items that aren’t available anywhere else.

The top-tier players who push the hardest stages get even more bragging rights: unique titles, badges, and other prestige items to show off their dedication. Honestly, nothing beats the satisfaction of conquering the toughest hordes, walking away with the best loot, and knowing your team nailed it.

Tips for success in Seasonal Horde Events
Build a balanced team: Make sure your group has a mix of damage dealers, tanks, and support classes to cover all bases.

Coordinate your abilities: Coordinate your skills and abilities with your teammates to maximize your effectiveness in battle.

Stay mobile: Keep moving to avoid enemy attacks and position yourself for strategic advantages.

Prioritize targets: Focus on taking down high-priority targets first to reduce the overall threat level.

Use crowd control: Use crowd control abilities to disrupt enemy formations and gain the upper hand.

Stay flexible: Be prepared to adapt to unexpected challenges and adjust your strategy on the fly.

Stick to these strategies and coordinate with your squad, and you’ll be able to tackle even the hardest Seasonal Horde Events in Diablo 4 S10 and come out on top.

How to Get Sushi Bear in Grow a Garden

The Sushi Bear is a limited, legendary pet introduced during the Cooking Event in Grow a Garden. It is a rare and exclusive pet that combines charming visuals with useful in-game abilities, making it one of the most desirable pets for collectors and strategists alike.

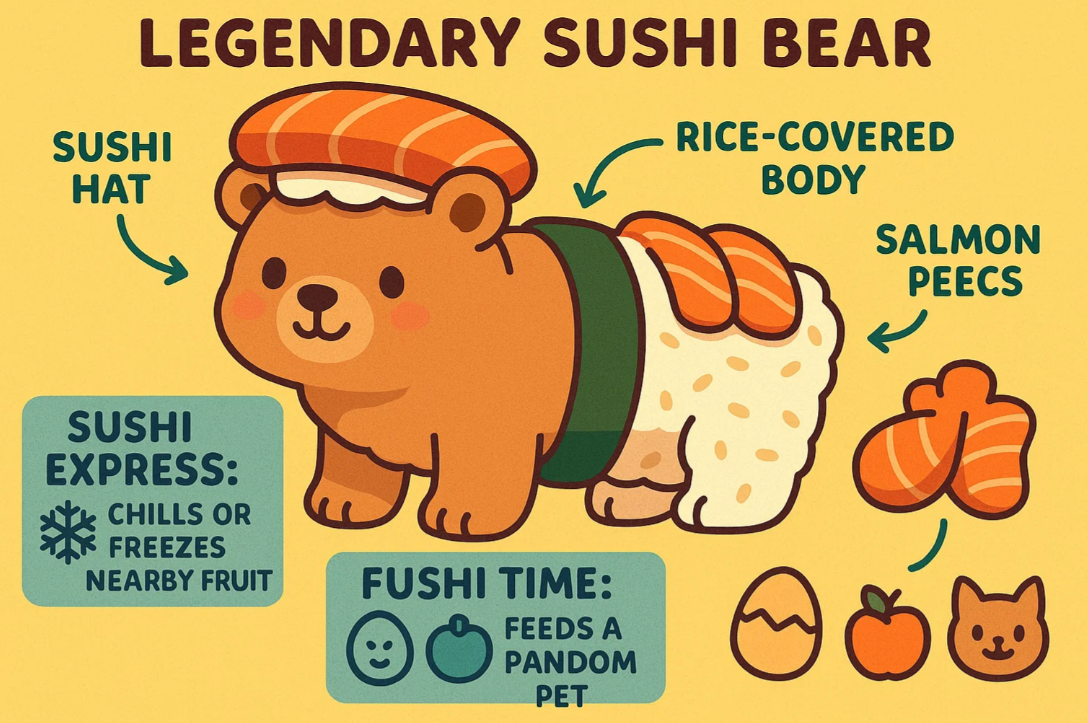
The Sushi Bear is a reskin of the Bear Bee, transformed with a sushi-inspired theme:

  • Sushi Hat: A small sushi roll sits atop the bear’s head.
  • Rice Body: The entire body is covered in fluffy rice.
  • Seaweed Belt: A strip of seaweed wraps around the bear’s midsection.
  • Salmon Pieces: Decorative salmon pieces are placed near the rear, adding a realistic sushi touch.

The combination of these features makes the Sushi Bear visually unique, blending cuteness with a fun culinary theme.

How to Get the Sushi Bear

The Sushi Bear is exclusively obtainable through the Gourmet Egg, with a 7% chance to hatch. It cannot be obtained through normal eggs or events outside the Cooking Event. Because of its rarity, patience and strategy are required to acquire it.

Methods to Get a Gourmet Egg

There are two primary ways to earn Gourmet Eggs in Grow a Garden:

  1. Give Cooked Meals to Pig Chef Chris P.
    • Location: Center of the island.
    • Tip: Cook at least Legendary meals, as the first Gourmet Egg reward is Legendary.
    • Note: Even cooking Legendary meals does not guarantee an egg, but it increases your chances.
  2. Give Mutated Meals to the Rat Connoisseur
    • Rewards may include a Gourmet Egg.
    • Best strategy: Use high-quality or rare mutated meals to maximize chances.

Sushi Bear Traits and Abilities

The Sushi Bear is not only visually striking but also brings unique gameplay benefits:

  • Sushi Express: Every 10–80 seconds, there is a >15% chance that a nearby fruit will become Chilled or Frozen, helping preserve fruits for longer and enhancing strategic gameplay.
  • Sushi Time: Every 100–670 seconds, the Sushi Bear flings a sushi toward a random pet, feeding it for 1–50% of its hunger. This can help maintain other pets’ happiness and reduce the need for constant feeding.

Sushi Bear Overview

AttributeDetails
TierLegendary
Obtaining MethodGourmet Egg
Passive AbilitiesSushi Express: Every 10–80s, >15% chance a nearby fruit becomes Chilled or Frozen
Sushi Time: Every 100–670s, flings a sushi towards a random pet and feeds it for 1–50% of its hunger
Hunger20,000
Obtainable?No
Date AddedAugust 2, 2025

Gameplay Strategy: Maximizing the Sushi Bear

  1. Fruit Preservation: The Chilled or Frozen effect from Sushi Express slows fruit decay, which is especially useful for completing high-level challenges or trading.
  2. Pet Feeding Support: Sushi Time helps maintain your other pets’ hunger, freeing up time for players to focus on gathering resources or cooking meals.
  3. Event Advantage: Owning the Sushi Bear during Cooking Events provides both aesthetic and functional benefits, making it easier to earn rewards and achieve event milestones.

Tips for Increasing Your Chances

  • Hatch Multiple Gourmet Eggs: With only a 7% chance, hatching several eggs increases the probability of obtaining a Sushi Bear.
  • Focus on Legendary Meals: When giving meals to Chris P., prioritize meals of Legendary rarity to maximize rewards.
  • Plan for Patience: As a limited-time event pet, the Sushi Bear may require multiple attempts to acquire.

The Sushi Bear is one of six new pets introduced in the Trading and Cooking Event Update on August 2, 2025. Its combination of rarity, exclusive appearance, and useful abilities makes it a highly coveted addition to any player’s collection in Grow a Garden. With careful planning, patience, and strategic use of Gourmet Eggs, obtaining this Legendary pet is both an achievable and rewarding goal.

If you’re looking to expand your collection and enjoy all the unique abilities in Grow a Garden, now is the perfect time to buy Grow A Garden pets, including rare and limited editions like the Sushi Bear. These pets not only add charm to your garden but also provide helpful bonuses that enhance gameplay and make every event more exciting.