Forza Horizon 6 Farming Guide: XP, Skill Points, Credits, and Wheel Spins Optimization

In Forza Horizon 6, progression speed is heavily influenced by how efficiently you can convert driving time into XP, Skill Points, Credits, and Wheel Spins. The most effective systems revolve around skill chaining, Car Mastery rewards, estate farming layouts, and AFK progression loops.

This guide breaks down two core farming approaches—active skill farming and AFK credit generation—based on high-efficiency mechanics that scale into late-game progression.

1. Core Farming Loop Overview (What You’re Optimizing)

Almost every high-efficiency method in FH6 ties into the same progression loop:

ResourceUsed ForPrimary Source
Skill PointsCar Mastery unlocksSkill chains / destruction combos
XPPlayer level progressionSkill chains / racing / AFK laps
CreditsPurchases & upgradesAFK races / mastery rewards
Wheel SpinsRandom rewardsCar Mastery unlocks
Super Wheel SpinsHigh-value rewardsRare mastery nodes

The goal is to convert skill chains → skill points → Car Mastery → spins/credits → repeat loop faster.

2. Best Skill Farming Cars (Meta Selection)

Two cars dominate early-to-mid FH6 farming efficiency due to their Car Mastery multipliers:

CarCostStrengthBest Use Case
Subaru 22B~86,000 creditsCheap + skill multiplier nodesEarly-game farming
Ford F-450 FERareDestruction chain boostsAdvanced farming setups

Why the Subaru 22B dominates

  • Contains a skill chain multiplier node (up to 2.5x) 
  • Expands combo ceiling up to 9x multiplier potential 
  • Cheap and widely available in the auto show
  • Easier entry point for all players

The F-450 FE is stronger in niche destruction setups, but the 22B provides better consistency per credit invested.

3. Estate Skill Farm Method (Primary XP + Skill Point Loop)

The Estate system is the highest-density skill farming environment in FH6.

Setup Requirements

RequirementDetails
Estate unlockProgress campaign naturally
Download blueprintCommunity-created skill map
Entry cost~400,000 credits (one-time setup)
Recommended carSubaru 22B

Farming Loop Breakdown

Once inside the estate:

  1. Drive into obstacle clusters
  2. Chain destruction combos (sideswipe, wreckage, air skills)
  3. Maintain multiplier (aim for 5x–9x range)
  4. Turn back at mid-point for efficiency
  5. Bank skill points by entering house/garage

Efficiency Metrics

MetricValue
Time per run~60 seconds
Skill points per run~10
Optimal skill score target500K–600K
Multiplier ceilingUp to 9x

This creates one of the most consistent early-game loops in FH6.

Important Stability Upgrade

To avoid losing chains:

  • Invest in extra skill chain protection perks 
  • Avoid full-speed wall impacts
  • Brake to neutral stop before banking

This prevents chain resets that reduce overall FH6 Credits efficiency.

4. Car Mastery Conversion Strategy (Spins + Credits)

Once skill points accumulate, they should be converted into high-value Car Mastery rewards.

Best Conversion Cars

CarCost (Skill Points)Reward TypeValue Output
Subaru 22BLowSuper Wheel SpinHigh RNG reward
Lamborghini Huracán Performante38 SP3 Wheel Spins + 1 Super SpinBalanced output
Dodge Viper GTS ACRModerate150,000 Credits nodeCredit farming

Optimization Strategy

  • Use 22B for spin farming efficiency 
  • Use Huracán Performante for balanced spin output 
  • Use Viper GTS ACR for direct credit conversion 

This allows flexible conversion depending on whether you need spins or FH6 Credits.

5. AFK Credit Farming Method (Passive Income Loop)

FH6 supports AFK-compatible driving loops using assisted driving systems.

Setup Configuration

Enable:

  • Assisted braking
  • Auto steering
  • Traction control ON
  • Stability control ON
  • Automatic transmission

Then select:

  • Time Trial mode OR endurance circuit
  • Preferably long-loop tracks (e.g., “Legend Island equivalent”)

AFK Execution Method

Input MethodSetup
ControllerRubber band trigger hold
KeyboardW key hold (physical lock)
OutputAuto lap completion

Each lap generates:

  • ~2,000–4,000 credits
  • ~1,000–2,000 XP

AFK Efficiency Comparison

ModeCredits / HourXP / HourEffort
Standard raceMediumMediumActive
Estate farmingHigh (skill-based)HighSemi-active
AFK loopVery high (time-scaled)HighNone

AFK farming becomes especially valuable overnight or during long idle periods.

6. Credit Optimization & Reinforcement Loop

One of the most effective reinforcement strategies is converting Car Mastery rewards into reinvestable assets.

Example Loop

  1. Farm skill points (Estate)
  2. Unlock spins or credits
  3. Convert rewards into new vehicles
  4. Reinvest into mastery nodes
  5. Repeat cycle

Some players even cycle rare unlocks into market flips for additional value.

7. Credit Scaling Strategy (Mid-Game to Late Game)

At scale, progression shifts from farming efficiency to conversion efficiency:

  • Skill Points → Spins → Rare Cars → Market Value → Reinvestment
  • Direct Credit Nodes → Immediate liquidity
  • AFK loops → Background accumulation

This is where buy Forza Horizon 6 Credits services are sometimes used by players to bypass early grind bottlenecks and focus purely on tuning, collection, and competitive racing builds.

8. Final Efficiency Breakdown

MethodStrengthWeakness
Estate Skill FarmFast skill point generationRequires setup cost
Car Mastery ConversionHigh reward burstsRNG dependent
AFK RacingPassive incomeLower efficiency per minute
Hybrid StrategyBest overall progressionRequires multiple systems

Conclusion

The most efficient progression in Forza Horizon 6 is not tied to racing alone, but to how effectively you convert skill chains into reusable progression assets. Estate farming provides the fastest skill acquisition loop, while Car Mastery systems act as the bridge into spins and credit generation. AFK loops then stabilize long-term accumulation.When optimized correctly, this system allows continuous scaling of FH6 Credits without requiring constant active gameplay, while still maintaining strong progression momentum across XP, rewards, and vehicle acquisition.
Path of Exile 2 0.5 Introduces First Real League Challenge System with Runes of Aldur

Path of Exile 2 finally receives its first fully realized seasonal challenge system with Patch 0.5: Return of the Ancients. The new Runes of Aldur league gives players a far clearer sense of progression throughout the season, replacing endless map grinding with structured goals and meaningful cosmetic rewards.

For longtime ARPG fans, the system feels much closer to the classic league challenge format many players hoped Path of Exile 2 would eventually adopt POE 2 Orbs.

Knight of Aldur Armour Set Rewards

The new challenge system revolves around eight league challenges, each tied to exclusive cosmetic unlocks. Every two completed challenges reward another piece of the Knight of Aldur Armour Set:

  • 2 Challenges: First Armour Piece
  • 4 Challenges: Second Armour Piece
  • 6 Challenges: Third Armour Piece
  • 8 Challenges: Full Armour Set + Permanent Hideout Totem Decoration

The reward structure is simple but highly motivating, encouraging players to engage with every major system introduced in Patch 0.5.

Tracking progress is straightforward. Players can open the Challenges menu anytime by pressing H in-game to monitor completed objectives and remaining tasks.

While small on paper, this feature makes the entire league feel significantly more organized compared to earlier Path of Exile 2 versions. Instead of aimless farming, players always have clear long-term goals to pursue.

1. Runeseeker Challenge

Runeseeker focuses on the new rune crafting system. Players must discover increasingly difficult Runic Remnants while completing advanced multi-slot inscriptions using the new rune mechanics introduced in the league.

2. Hunter Challenge

Hunter sends players back across the campaign to defeat optional bosses, including encounters like:

  • The Crowbell
  • Great White One
  • Additional hidden bosses many players likely skipped during normal progression

This challenge encourages deeper exploration and rewards players for revisiting older areas with stronger characters.

3. Ascendant challenge

The Ascendant challenge marks a major difficulty spike.

To complete it, players must obtain all eight Ascendancy Points, including the difficult final Trials tied to Zarokh and the Trialmaster. Unlike earlier objectives, Ascendant forces players to engage with challenging endgame systems rather than remaining in safe early mapping content.

For many players, this will likely become one of the league’s biggest progression walls.

4. Reliquarian challenge

Not every challenge is brutally difficult. Patch 0.5 also includes more relaxed objectives that allow casual players to make consistent seasonal progress.

Reliquarian simply requires players to identify 50 Unique Items throughout the league.

5. Artisan challenge

Artisan revolves around using all 13 Verisium crafting ingredients obtained from Runic encounters.

These objectives provide steady advancement without requiring nonstop boss farming or high-end optimization every session.

6. Cartographer challenge

Cartographer is one of the largest time investments in the entire league challenge system.

The objective requires players to fully allocate the enormous Atlas Passive Tree, something that naturally takes substantial endgame progression. Defeating the Arbiter of Divinity multiple times can significantly accelerate completion, but the challenge is still designed as a long-term seasonal grind.

For dedicated players pushing deep into the Atlas, Cartographer will likely complete naturally over time.

7. Vanquisher challenge

The final challenge, The Vanquisher, is clearly aimed at elite endgame players.

To complete it, players must defeat three Pinnacle Bosses at maximum difficulty:

  • Vessel of Kulemak
  • The Bodach
  • Tangmazu

These encounters represent some of the hardest content currently available in Path of Exile 2 and are tied to major endgame mechanics including Abyss, Ritual, and Delirium.

Early in the league, completion rates for this challenge will likely remain extremely low.

Path of Exile 2 Patch 0.5 Feels Like a Major Turning Point

Return of the Ancients feels like a huge step forward for Path of Exile 2.

The new challenge system gives players clearer goals, better seasonal rewards, and stronger incentives to experience every part of the game instead of endlessly repeating the same farming strategy buy POE 2 Orbs. Whether players are chasing the full Knight of Aldur Armour Set or simply looking for a more structured seasonal experience, the Runes of Aldur league adds significantly more depth and replay value to Path of Exile 2.

With the league launching on May 29, 2026, Patch 0.5 is shaping up to be one of the game’s biggest and most important updates yet.

Kage Crow in Adopt Me: The Ultimate Guide to This Ultra-Rare Pet

The Kage Crow is one of the most coveted ultra-rare pets in Adopt Me! and has captured the attention of players worldwide since its release. Introduced on April 4, 2025, during the Cherry Blossom Festival, this majestic crow has become a symbol of rarity and prestige in the game. Whether you’re a seasoned trader or a new player hoping to enhance your pet collection, understanding the Kage Crow’s features, tricks, and appearances is essential for anyone looking to buy Adopt Me pets wisely.

In today’s evolving Adopt Me! trading market, pets like the Kage Crow perfectly represent how value, timing, and rarity come together. As an event-exclusive ultra-rare pet, its limited availability continues to drive demand among collectors and traders alike. For players aiming to grow a strong and competitive inventory, learning the background and long-term value of pets like the Kage Crow is a smart step. This kind of knowledge helps you make better decisions when you buy adopt me pets, avoid unfair trades, and focus on pets that hold both visual appeal and lasting prestige within the game.

How to Obtain the Kage Crow

Originally, the Kage Crow could be acquired during the Cherry Blossom Festival for 75,000 Cherry Blossoms. It was also available through the Cherry Blossom Wagon’s item rotation during the event. Now, however, this ultra-rare pet is no longer obtainable through normal purchase and can only be acquired through trading with other players.

Due to its limited availability, owning a Kage Crow has become a mark of prestige in the Adopt Me! community. If you are looking to add this pet to your collection, focusing on trading strategies or rare pet exchanges is key. For those eager to expand their inventory, knowing when and how to buy Adopt Me pets like the Kage Crow can save time and in-game currency.

Kage Crow Tricks

The Kage Crow is not only visually stunning but also highly interactive. As it grows, it learns a sequence of tricks that make it a fun companion to train and play with. Here’s the complete list of tricks:

  • Newborn: Sit
  • Junior: Joyful
  • Pre-Teen: Beg
  • Teen: Jump
  • Post-Teen: Trick 1
  • Full Grown: Trick 2

Training your Kage Crow through these stages not only boosts its happiness but also adds to the overall experience of raising an ultra-rare pet. Players often enjoy unlocking these tricks sequentially, as each one enhances the crow’s personality and appeal.

Appearance and Unique Features

The Kage Crow stands out with its dark, elegant coloration and intricate feather design:

  • Body Color: Black and dark blue
  • Feathers: Long head and chest feathers
  • Beak: Black and dark blue
  • Feet: Dark blue
  • Eyes: Glowing red
  • Gradient: Black to dark blue on head, chest, wings, and tail

Its mysterious and mystical appearance makes it one of the most aesthetically pleasing pets in Adopt Me!.

Neon Appearance

For players who love customization, the Neon Kage Crow is a spectacular upgrade. The Neon version glows with a purple to pink gradient across the head, chest feathers, wings, and tail. Its feet emit a soft pink glow, giving the pet a magical and enchanting aura that is highly sought after in the trading community.

Mega Neon Appearance

The Mega Neon Kage Crow takes this even further. The areas that glow in the Neon version now cycle through the full rainbow spectrum, making it a dazzling showpiece in any player’s pet collection. Its vibrant, constantly changing colors make it one of the most impressive pets for those who want to stand out in Adopt Me!

Tips for Players Looking to Buy Adopt Me Pets

If your goal is to buy Adopt Me pets like the Kage Crow, consider the following tips:

  1. Follow Limited-Time Events: Many ultra-rare pets are released during seasonal events. The Kage Crow originally appeared during the Cherry Blossom Festival, highlighting the importance of timing.
  2. Trade Strategically: Since the Kage Crow is now only obtainable through trades, building a reputation as a fair trader and knowing the current pet market trends can increase your chances of acquiring it.
  3. Upgrade to Neon or Mega Neon: While owning a regular Kage Crow is impressive, Neon and Mega Neon versions are highly valued. Investing in in-game items or pets that can be traded for upgrades is worth considering.
  4. Track Community Updates: Join Adopt Me! forums, Discord servers, and social media groups to stay informed about rare pet trades and event news.

Conclusion

The Kage Crow is more than just a pet in Adopt Me!—it’s a status symbol, a collectible, and a fun companion all in one. From its dark, mysterious feathers to its glowing Neon and Mega Neon transformations, it represents the pinnacle of ultra-rare pets. Players looking to buy Adopt Me pets should keep an eye on trading opportunities and seasonal events, as the Kage Crow’s limited availability ensures it will always be a prized addition to any collection.

Owning a Kage Crow is a mark of dedication and style, making it one of the most desirable pets in the game. For those who manage to add it to their inventory, the reward is not just the pet itself, but also the admiration of the Adopt Me! community.

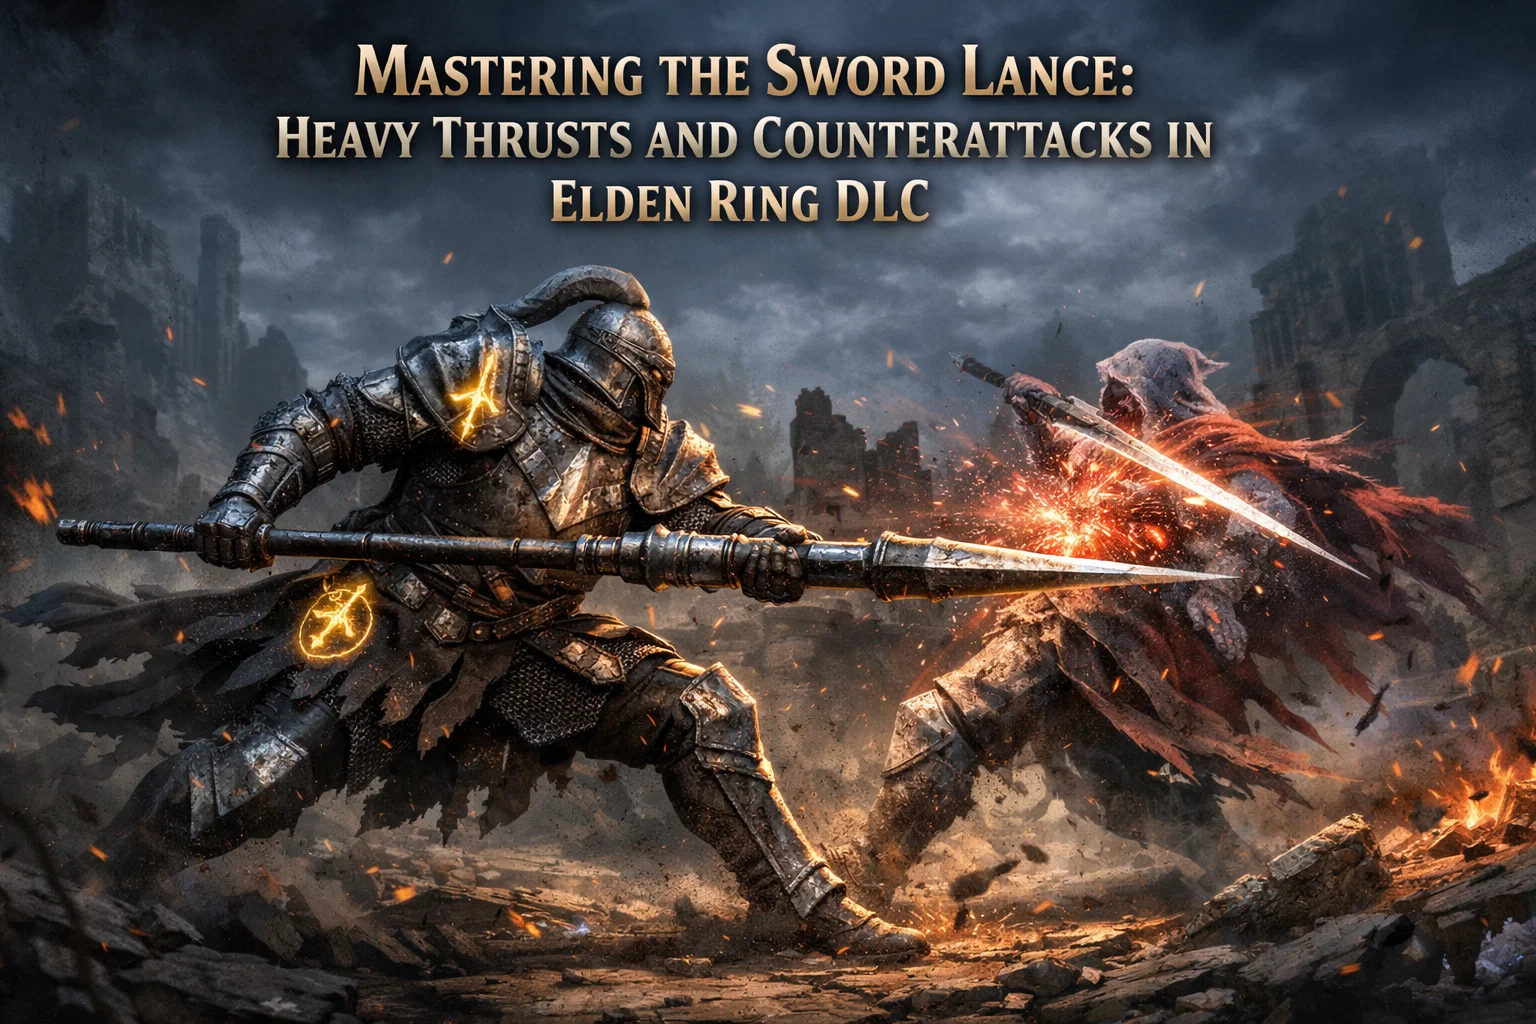
Mastering the Sword Lance Strength Build in Elden Ring DLC

With the Elden Ring DLC bringing new weapons and balance changes into the spotlight, it’s always refreshing to see a setup that feels both simple and brutally effective. One build that has quietly stood out is the Sword Lance strength build, centered around heavy thrusting sword mechanics and smart counterattack trading. After watching extensive PvP invasions and testing similar setups myself, this build proves that raw fundamentals still matter in a meta full of flashy skills and spell spam.

This article breaks down how the Sword Lance works, why its heavy attack combo is so deadly, and how you can use it effectively in real PvP situations without overcomplicating your playstyle.

Why the Sword Lance Works So Well

At its core, the Sword Lance belongs to the heavy thrusting sword class, but it plays very differently from older weapons in that category. The key reason is its heavy attack into light attack combo. Landing a charged or partially charged heavy thrust allows a guaranteed light follow-up, which creates massive burst damage if the opponent is attacking at the same time.

Because the Sword Lance deals pierce damage, it benefits heavily from counterattack bonuses. If you hit an enemy during their attack animation, the damage spike is noticeable. In invasions, this often leads to situations where a single clean trade deletes a phantom outright, especially if they’re lightly armored or already chipped down.

This makes the weapon especially strong against aggressive players who rely on jump attacks, weapon skills, or panic pressure. Instead of dodging everything, you’re encouraged to stand your ground and take calculated trades.

Core Playstyle: Trading Smart, Not Trading Blind

This build is not about swinging wildly and hoping for the best. The real strength comes from understanding timing. You want to bait attacks, especially predictable ones like jump attacks or running heavies, and meet them with your own heavy thrust.

Once the heavy connects, the light follow-up comes out fast and hits hard. Many players underestimate how quickly that second hit lands, which leads to surprise kills even through decent armor.

That said, not every trade is worth taking. Ultra weapons with massive poise damage or certain Ashes of War can still overwhelm you. Learning when to disengage is just as important as knowing when to commit.

Talismans That Make the Build Shine

Two talismans do most of the heavy lifting here. The Spear Talisman boosts counterattack damage for pierce attacks, which synergizes perfectly with the Sword Lance’s playstyle. Since you’re actively trying to hit enemies during their attacks, this bonus is almost always active.

The Two-Handed Sword Talisman is the second key piece. When two-handing the weapon, you get a flat damage boost, which stacks nicely with counter damage and buffs. Together, these talismans turn already strong trades into fight-ending moments.

Defensive talismans also matter. High poise allows you to finish your heavy attacks without being staggered, which is essential when fighting multiple opponents or spell-heavy teams.

Stats and Armor: Keeping It Simple

This is a straightforward strength build. Strength should be your main damage stat, pushed as high as your level allows. Endurance is equally important because you’re wearing heavy armor and trading hits. Running out of stamina mid-fight is a death sentence.

Vigor should not be neglected. In invasions especially, you’ll often take chip damage from spells, arrows, or off-screen attacks. Extra health gives you room to make mistakes.

For armor, heavy sets with good poise are ideal. You don’t need anything fancy. The goal is to survive long enough to land your heavy attack, not to look stylish.

Some players prefer farming runes to speed up reaching these stat thresholds. While it’s completely optional, players who want to skip repetitive farming sometimes look into ways to buy elden ring runes early on to experiment with multiple builds without committing dozens of hours to grinding.

Buffs and Ashes of War

This build doesn’t rely on flashy Ashes of War, which is actually part of its strength. Royal Knight’s Resolve is a strong option if you want to push damage even further. When combined with a counterattack, the numbers get absurd fast.

Consumables like Exalted Flesh and Uplifting Aromatic can temporarily push your attack rating to terrifying levels. These buffs are best saved for key moments, such as when facing multiple phantoms or when you’re confident you can force a trade.

The nice thing here is flexibility. Even without buffs, the Sword Lance performs well. Buffs simply raise the ceiling.

Dealing With Common PvP Threats

Magic-heavy teams are one of the bigger challenges. Sorceries like Stars of Ruin or skull-based spells can force you to move constantly, breaking your rhythm. In these situations, patience is key. Focus on positioning, use terrain, and wait for the moment when a caster gets greedy.

Against popular weapons like Moonveil or Rivers of Blood, the Sword Lance surprisingly holds its own. Many players rely on muscle memory and predictable follow-ups. If you recognize those patterns, trading into them often works in your favor.

Latency can also play a role. Even if connections are messy, pierce damage and counter hits still punch through surprisingly well, making the build feel consistent even in less-than-perfect conditions.

Progression Tips for Newer Players

If you’re newer to Elden Ring PvP, this build is a solid entry point. It teaches good fundamentals like spacing, timing, and reading opponents rather than relying on gimmicks.

Leveling can take time, especially if you want high strength, endurance, and vigor early. Some players choose to buy elden ring runes u4gm as a shortcut to reach testing levels faster, especially when experimenting with DLC weapons. Services like U4GM are often mentioned in community discussions, but regardless of how you level, understanding the build matters more than raw stats.

Practice landing heavy attacks in low-risk fights first. Once the timing clicks, the build becomes incredibly satisfying.

The Sword Lance strength build proves that Elden Ring PvP doesn’t always need complex setups or flashy skills to be effective. With smart trading, strong fundamentals, and a weapon that rewards confidence, this build excels in invasions and duels alike. If you enjoy a grounded, aggressive playstyle that punishes mistakes hard, the Sword Lance is well worth your time.

Key Takeaways: Unlock Hidden Secrets in Elden Ring with These 9 Advanced Tips

How to Get Gumdrop in Grow a Garden

The Gumdrop is a Legendary-tier crop in Grow a Garden, introduced during the second phase of the Christmas Harvest Event. Known for its festive candy-like appearance and strong economic value, the Gumdrop quickly became one of the most popular and desirable crops among players. Its ability to be multi-harvested further increases its long-term usefulness, making it an excellent choice for both collectors and profit-focused gardeners.

Overview

Gumdrop is a seasonal crop tied to limited-time event rewards. While it is currently obtainable, players must rely on event gifts and chance-based drops to acquire its seeds. Due to its rarity, Gumdrop seeds are considered valuable trading items within the community.

The Gumdrop is a legendary, multi-harvest crop in Grow a Garden, introduced during the Christmas Harvest Event and valued for its festive appearance and high market price. With its colorful candy-like design, strong profit potential, and limited-time availability through Gold and Mythical Gifts, Gumdrop has become a favorite among dedicated players. For those looking to expand their collection, optimize farming strategies, or buy grow a garden pets to support crop growth and efficiency, Gumdrop represents a perfect blend of rarity, beauty, and long-term value.

Appearance Details

The Gumdrop crop has a visually striking design inspired by holiday candy themes:

  • The harvested produce resembles a gumdrop candy, appearing in a variety of bright and appealing colors.
  • The plant itself features a white dripping layer at the top, giving it a snow-covered or sugar-glazed effect.
  • The lower portion of the plant is a deep dark purple, providing strong contrast with the white drip.
  • Gumdrop seeds are purple and include two small gumdrop decorations, making them easily identifiable in inventory.

This festive design makes Gumdrop especially popular during winter-themed events and decorative garden builds.

How to Obtain Gumdrop

Gumdrop can only be obtained through special event-related gifts. These gifts are usually earned by participating in the Christmas Harvest Event or through limited-time challenges.

Gift Drop Chances

  • Gold Gift
    • 30% chance to obtain Gumdrop
  • Mythical Gift / Rainbow Gift
    • 15% chance to obtain Gumdrop

Because these are chance-based rewards, players may need to open multiple gifts before successfully obtaining Gumdrop seeds.

Farming and Harvesting

One of Gumdrop’s biggest advantages is that it is multi-harvest, meaning it can be harvested multiple times after being planted. This makes it especially efficient for long-term farms and high-profit layouts.

  • Growth Time: Unknown
    • Players are advised to consult a Content Moderator or Administrator for confirmed growth data.

Despite the unknown growth time, Gumdrop’s high resale value makes it worth the wait.

Value and Profitability

Gumdrop is considered a high-value crop due to its legendary status and strong market performance.

Crop Value

  • Price-Floor Value: 58,662 Sheckles
  • Average Market Value: 65,000 Sheckles

Crop Weight Statistics

  • Price-Floor Weight: 2.38 kg
  • Average Weight: 2.50 kg
  • Minimum Weight: 1.75 kg
  • Huge Chance: 1.33%

Heavier Gumdrops typically sell for higher prices, making weight boosts and farming bonuses particularly effective when growing this crop.

Gumdrop Information Table

CategoryDetails
TierLegendary
Currently Obtainable?Yes
Multi-harvest?Yes
Date AddedDecember 13th, 2025
Floor Value58,662 Sheckles
Average Value65,000 Sheckles
Average Weight2.50 kg
Minimum Weight1.75 kg
Huge Chance1.33%
Growth TimeUnknown

Tips for Players

  • Save Gold Gifts for the highest chance of obtaining Gumdrop.
  • Focus on multi-harvest farming strategies to maximize long-term profit.
  • Use weight-enhancing boosts or garden upgrades to increase crop value.
  • If Gumdrop becomes unobtainable after the event, holding onto seeds may increase their future trade value.

The Gumdrop is a visually charming and economically powerful crop in Grow a Garden. Its limited-time availability, high value, and multi-harvest capability make it a top-tier choice for dedicated players. Whether you aim to decorate your garden, increase your income, or complete a legendary collection, Gumdrop is a crop worth pursuing during the Christmas Harvest Event.